Tuesday, January 18, 2011

Second Challenge Entry!

Good afternoon everyone!


Meet...THE LOVE MACHINE!!


The recipe for this card...

Supplies:
- Gypsy
- Cricut Cartridges: "Mini Monsters”, “Create a Critter”, “Celebrations”, “ZooBalloo”, “Gypsy Wanderings”
- k-i Memories Designer Paper Pad: Funky Paper Pad II (12 x 12)
- Imaginisce: To Love and Cherish (Juliet)
- Standard Red Cardstock
- Peachy Keen Stamps: PK-491 Everyday Character Faces 1 1/8"
- Cri-Kit Glitter Pens

For this card, I cut the Frankenstein monster at 2.76” wide and 3.50” high from the “Mini Monsters” cartridge.  His hair and shoes were cut at 2.08” wide and 3.50” high from Imaginisce’s “To Love and Cherish” line (specifically the Juliet paper).  The ruffled heart that our “love machine” is wearing is cut at 1.09” wide and 1.00” high from the “Gypsy Wanderings” cartridge.  I used Peachy Keen Stamps' Everyday Character Faces in place of the standard face included with the cut.  The hearts decorating the card were cut at 2.53” wide and 2.00” high from the “Create a Critter” cartridge.  The sentiment was written using “Create a Critter” (for “love”) and “ZooBalloo” (for machine) using the Cri-Kit glitter pens and the speech bubble is from “Create a Critter” cart as well.  For this card, I cut the base of the card from the “Celebrations” cartridge at 12" wide and 10.92" high.  The patterned background for the card was also cut from the same cartridge at 10.25” wide and 9.33” high. 

Wish me luck! J

Ashley aka “Scrappin’ Pink Piglet” 
>:@

Fantabulous Cricut Challenge #43 - My Entry!

Good afternoon everyone!

I hope everyone is having a wonderful Tuesday!  I had a snow day today (teachers love them too!) so I decided to create a two projects for three different challenges.  The first card, featured here, is for the Fantabulous Cricut Challenge #43 – “Sweet Shop”.  The challenge was to incorporate something "sweet" on your project (i.e.: ice cream, candy, cake etc...).  I decided to make a card with a bit of a twist to it ;)


The recipe for this card...

Supplies:
- Gypsy
- Cricut Cartridges: "Wild Card”, “Create a Critter”
- k-i Memories Designer Paper Pad: Funky Paper Pad II (12 x 12)
- Standard Pink Cardstock
- Pink by Design Stamps: "Take the Cake” set
- Peachy Keen Stamps: PK-491 Everyday Character Faces 1 1/8"
- Martha Stewart Crafts’ Dual-Tip Marker: Ladybug
- Martha Stewart Crafts’ Scoring Board

For this card, I cut the cake from the “Wild Card” cartridge at 5.67” wide and 4.50” high (this is for both the checkered pink and bright pink portions).  I achieved the “eaten” look by taking a cut from the “Create a Critter” cartridge (at 2.62” wide and 2.00” high) and overlapping it on top of the cake outline.  I cut the cake first, then added an additional small strip of paper to absorb the outside of the cake.  I cut the flower on the top of the cake at 1.5” wide and 1.4” high.  The face on the front of the cake is from Peachy Keen Stamps’ Everyday Character Faces at 1 1/8”.  I used Martha Stewart Crafts’ Dual-Tip Marker in Ladybug to fill in the cake’s mouth.  Both sentiments featured on the card are from the Pink by Design “Take the Cake” set.      

Thank you for taking the time to read my post and view my card!  I definitely appreciate it! J

Take care, and enjoy the rest of your Tuesday!

Ashley aka “Scrappin’ Pink Piglet” 
>:@

Saturday, January 15, 2011

Pink by Design: Design Team Tryouts PROJECT! :)

Good evening all!

I hope all is well with you and yours this evening J  I've had a busy but productive day...including spending some time with some new friends at a scrapbooking group meetup near my house.  I met a nice and fun group of ladies, and am very excited to continue scrapping with them on a monthly basis :)  

I wanted to share the project I submitted to Sarah of Pink Cricut and Pink by Design for her design team tryouts.  I am a HUGE FAN of Sarah's - I love her stamp sets and projects and she's always willing to answer a question (or twenty) from me on Facebook (lol) :)  I was super excited when she opened up her design team tryouts and am hoping that I might just have a shot at making a design team (one of my goals for this year)!  Without further ado...my design team try-out project:


The recipe for this card...

Supplies:
- Gypsy
- Cricut Cartridges: "Celebrations", “Create a Critter”, “My World”
- k-i Memories Designer Paper Pad: Funky Paper Pad II (12 x 12)
- DCWV “The Natural Stack” (12 x 12)
- Cricut Paper Pad: “Celebrations” (6 x 12)
- Pink by Design Stamps: "Take the Cake” set
- Sizzix Big Shot & "Dashes" Texture Plate
- Paper Clips
- Hot Glue Gun
- iRock and the iRock Hot Rocks Compact
- Martha Stewart Crafts’ Dual-Tip Marker: Turquoise
- Martha Stewart Crafts’ Scoring Board

For this card, I cut the base of the card from the “Celebrations” cartridge at 12" wide and 10.92" high.  The “grass” for the card was also cut from the same cartridge at 10.25” wide and 9.33” high.  Both bases were scored in half using the Martha Stewart Crafts’ scoring board.  Each cow was cut from the “Create a Critter” cartridge at 1.75” wide and 1.32” high using the DCWV “The Natural Stack” (black and tan glitter paper), at 1.62” wide and 1.32” high using standard white cardstock, and 0.97” wide and 1.32” high using the k-i Memories Designer Paper Pad: Funky Paper Pad II (pink paper).  I used Martha Stewart Crafts’ Dual-Tip Marker in Turquoise to highlight each cow’s eyes.  The cows’ party hats were cut from three different papers found in the Cricut Paper Pad “Celebrations” at 0.72” wide and 1.00” high.  I added a “Hot Rock” to each of the cows' hats using my iRock as well.  The fence was cut from the “My World” cartridge at 4.75” wide and 0.50” high using the DCWV “The Natural Stack”.  To complete the card, I cut the scalloped oval from the “Create a Critter” cartridge at 2.25” wide and 1.71” high and stamped the sentiment from the Pink by Design “Take the Cake” set!   

As for the 3-D effect I created with my cows…you might think it was Action Wobbles – BUT IT ISN’T!  I was not one of the lucky ones to be able to receive an advance sample of the product (little bit slow on hearing about the promotion, lol) and since they came out on a few days ago, I knew I needed to be creative if I wanted to have the same effect.  To create this effect, I wound paper clips into springs (with my husband’s help – I don’t think he really trusts me with his tools, lol) and attached the springs to my cows and my card using a hot glue gun.  The effect turned out exactly as I had imagined it, and I think it worked perfectly with the theme of this card! 

This card had a couple of “firsts” for me.  It was the *very first* card I created on my Gypsy (and it made me realize how much I *love* my Gypsy).  It was also the first card I ever used glitter paper on (party cows need glitter, of course!).  Last, but not least, it was the first card I ever used motion/3-D effects on (Action Wobbles, here I come!). 

Overall, I am super pleased with this card and hope that you like it too!

Thank you for following! 

Take care :)
Ashley "Scrappin' Pink Piglet"
>:@

Sunday, January 2, 2011

Second Project of 2011! :)

Hello again!

As promised, I have a second project completed tonight!  This will be my submission to Flaunt It Fridays' Challenge #5 using the martini glass found on the cartridge "From My Kitchen".  I was super excited to use this cartridge - I've had it for a while, but hadn't had a reason to play with it til now!  Without further ado...my submission for the challenge:


As you can guess, I had a bit of fun with my iRock tonight ;)

The recipe for this card...

Supplies:
- Cartridge: "From My Kitchen"
- iRock and the iRock Hot Rocks Compact
- Pastel Fashion Colors Value Pack (martini glass outline)
- k-i Memories Designer Paper Pad: Funky Paper Pad II (martini and olive in glass)
DCWV Brights Adhesive Mat Stack (olive with sentiment inside)
- Pink by Design Stamps: "Christmas Wishes" (sentiment)
- Peachy Keen Stamps: "Happy Lashes Face Assortment"
- Sizzix: "Dashes" Texture Plate
- Stickles: "Star Dust"

For this card, I cut the base of the martini glass at 4" wide and 4.754" high.  I cut two additional martini glasses for the inside of the glass at both 3.4" wide and 4.154" high and 2" wide by 2.754" high.  The olive inside the glass was cut at 1.142" wide and 1.312" high.  The ovals for the sentiment were cut at 2.493" wide and 1.505" high and I trimmed the inner white circle slightly with a pair of scissors to fit. 

I absolutely love this card!  It was a lot of fun to make.  As I said before, I think the iRock and gems were perfect for this card - you always need a little bling when you're drinking a martini! ;)

I was also super excited to use my Peachy Keen stamps for the first time, especially since I've heard such wonderful things about them from everyone in the crafty blog world!  I think they look great and work perfectly on both cards I've created tonight!

Wish me luck with the Flaunt It Friday's challenge!!

Til my next project :)

Ashley
>:@

First Project of 2011!

Greetings to all! :)

I hope that 2011 has treated you kindly so far!  I am very much looking forward to starting a new year.  2010 was rough for many of my friends, and I'm hoping that 2011 will bring more happiness and peace to them all! 

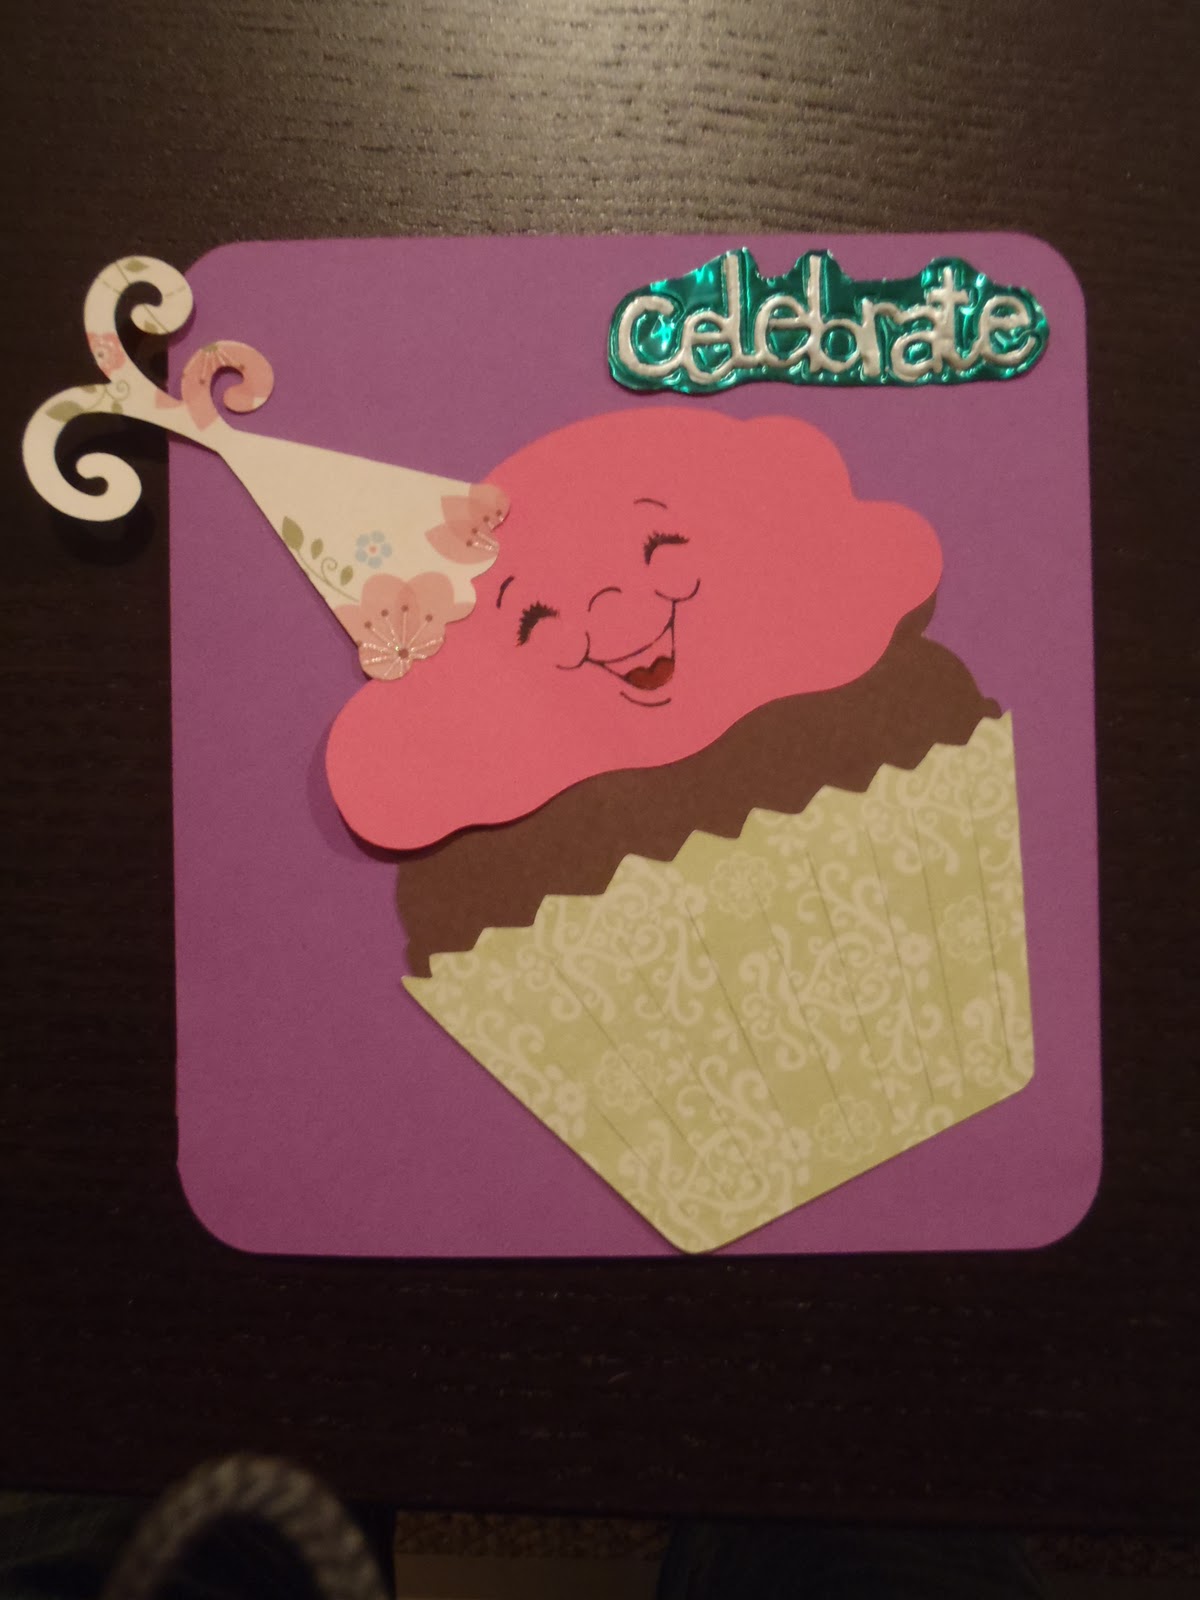
I have a brand new project to share!  This is my submission for Paper Playtime's Challenge #32 in which the requirement is to use your PEACHY KEEN FACES!  Perfect challenge for this PKS newbie! :) 

Without further ado...here is my card!


The cupcake and party hat are both from the Celebrations cartridge.  The paper I used for both the party hat and the cupcake wrapper are from Imaginisce's "Fairest of Them All" collection (a bit older collection that I found at a local scrapbooking shop) and the cupcake (yummy chocolate cupcake!) is from Imaginisce's "Cottage Christmas" collection.  The other paper I used is your standard cardstock :)  The lovely face on my cupcake is, of course, from the Peachy Keen Stamps' Happy Lashes Face Assortment.  Love my Peachy Keen stamps! :)  The "celebrate" sentiment was created using Cri-Kits' new embosser tool and metal.  My husband purchased it for me for Christmas to compliment the Cri-Kits pens that my sister-in-law gave me.  It is a cool product, though it has a bit of a learning curve when using it, but I would recommend it!

Stay tuned!  2011 is off to a great start!

Thanks for following :)

Ashley
>:@

Thursday, December 16, 2010

cute cards and crafts by Jamie: Reindeer Christmas Cards and a Surprise!

Awesome Scrappy Mom Stamps Giveaway!! Please enter Jamie's contest!

cute cards and crafts by Jamie: Reindeer Christmas Cards and a Surprise!: " Ok Everyone, here is another fun project I made using my Create A Critter cartridge and some more Die Cuts With A View cardstock :) I ..."

Wednesday, December 15, 2010

Letraset ProMarker Giveaway!

Greetings all!

I know it has been a while since I last posted, but it has been ridiculously busy around our house.  Between jobs...housework...the kittens...and life in general, I have not had a single moment to use my Cricut (other than some very simple placecards for Thanksgiving!).  I am hoping that with my Winter Break coming up (1 1/2 weeks of no lesson planning or grading, thank goodness) I will have time to play with my Gypsy and new cartridges and get some new projects posted.   Anyways...enough about me and my hectic life! 

IMPORTANT NEWS!

Letraset, the producer of ProMarkers, has launched a new blog (http://www.letrasetuk.blogspot.com/) and a new website (http://www.letraset.com/).  To celebrate these amazing new sites and resources, they will be hosting a PROMARKER GIVEAWAY!  They will be giving away 10 assorted ProMarker 5 sets to a lucky winner on January 6th.  Although I have not used the markers myself, I have heard many good things about them and would be eager to try them out.  For information on the giveaway, please check out the blog posting here.  Good luck to all those who participate!

Happy Holidays and Merry Christmas to all!  Hope to have a crafting post up soon!

Ashley
>:@